Saturday, March 27, 2010

Save green ... on the green

Although the weather doesn't seem warm enough today, golf season is upon us! With charity events, corporate golf outings and tournaments, what are the most popular giveaways this year? Avid players will tell you, a golfer needs a lot of accessories to play the game (golf balls, tees, club cleaners etc). From golf tees to performance apparel, we can help you get everything you need for your event. Some of the hottest items for golfers this include tees, balls, multi-tools, water bottles and pocket towels.

Tees are available in numerous colors, with a screen printed logo about 1 1/2" wide. Packaged in groups of 10 (other quantities available), these tees start at $0.74 per package. Would you rather print your name on golf balls? Not a problem! We can get you Titleist, Wilson, Pinnacle, Top Flight, Nike and Callaway brand golf balls printed with your logo, and packaged singly or up to 12 per box. The average logo size for these balls would be 3/4" diameter.


Ever need a golf ball cleaner? This was voted the PGA Merchandise Show Award Winning Product because it is a safe and unique way to clean your golf ball on the green. Completely soak inside, wring out excess water and place flat in the pocket. The pocket stays bone dry! 

Not sure about the best promotional product for you? How about the deluxe golf knife,a chrome finished mutli-purpose golf knife with ergonomic styling. It features 6 tools: divot repair tool, spike wrench, bottle opener, screw driver and removable ball marker. Starting at $3.60 each, these multi-tools allow for two printing areas measuring up to 1" wide. 

Don't forget about the divot tool, golf club groove cleaner, multi-purpose brush (spike wrench and shoe horn), detachable divot key ring, ball marker, golf pouch, water bottle and golf club cover; and who wouldn't love a golf cooler, filled with towel, tees, divot repair tool, can holder and bottle opener! Add more items before the big event as well!

Promotional shoe bags are always a hit! Made of 600 denier nylon, this bag features a large main compartment for shoes, small side compartment for golf balls or shoe spikes, separate compartment for polish, shoe mitt etc., and a nylon webbed carrying handle. The imprint area is as large 7" x 3". This shoe bag is so versatile that your name will be staying with golfers for a long time!

Now that you have your promotional products all set, what are you going to wear?! From cotton to polyester, we can find a polo shirt that works for you. With moisture wicking capabilities, you will stay cool on the green all day. Brands available include Nike, Adidas, Port Authority, Reebok, ALO, all of which are available in women's styles. (Ladies you are all set!) Visors and caps are also available. 

Don't limit yourself! Stop in today to see what we can do for you! With so many items to choose from, we can make promotional items and apparel work on your budget! Mention this blog and we will save you an additional 5% off your golf promotion order!

Have a successful and safe golf season! We hope to see you on the green!

Wednesday, March 10, 2010

How is that t-shirt made?

Have you ever wondered how your t-shirt was made? Or why some printed shirts look different than others? Or why there are so many printing options when all I want is my logo on a shirt? There are several ways to make a t-shirt with benefits to each. I am sure the first thing that comes to mind is screen printing because this has been around "forever". Screen printing uses open areas of mesh screens (the open area being your logo) that allow plastisol ink to be squeegee-d onto a garment. Once the ink is on the shirt it is "flashed" (partially cured) and layered with another color, or run through a dryer to completely cure the ink.

A similar alternative to screen printing is heat pressing plastisol transfers utilizing the same type of inks. With this, the image is screened onto sheets of paper rather than directly onto the garment. The sheets are partially cured and then heat pressed onto the garment. With screen printing and plastisol transfers, these are best purchased in bulk. Typically the largest number of colors you would want to use is 6.

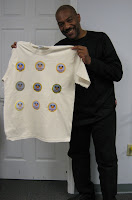
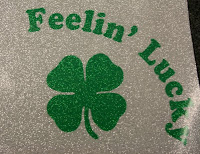
On that note, if you are looking for a full color print on a shirt you may consider a custom printed vinyl transfer. This type of transfer allows for full color reproduction of virtually any design and color (photos, gradients etc). These are printed on a large format printer with eco-solvent inks and then pressed onto the garment. This is a notable option for small quantities, intricate designs and numerous colors. The industry has brought out numerous specialty materials that give an added edge to your logo. These vinyl materials are printed directly onto, then pressed and include flock print (fuzzy & soft), glitter print, twill print (gives the look of a printed patch), reflective print, metallic print and puff print (actually puffs out on the shirt when exposed to the heat press). (The Niskayuna Fire logo's are full color prints on standard printable vinyl. The camouflage star is a camouflage image printed onto flock material and then embroidered onto a garment, and the"feeling lucky" is glitter print material before it has been weeded.)

For full color prints there is also sublimation and direct to garment printing. Sublimation uses specialty inks that when heated at high temperatures next to a polyester substrate, form a gas and adhere to the item. This is also used on mugs, tiles, fiber board and more. Although you can print unlimited colors, the catch is that it must be pressed onto a polyester fabric...so no cotton t-shirts with this! Direct to garment printing is fairly new to the industry and utilizes inkjet technology to print directly onto a garment (which is why it is called direct-to-garment...). The shirt is put onto a platen and run through the printer, which means unlimited colors...and cotton t-shirts!

If you have a single color design and you need a small quantity, an alternative is single color cad cut vinyl. Similar to the full color custom printed vinyl, this material is instead cut (versus printed) into the desired logo, weeded (the removal of the excess pieces) and pressed onto the garment. This is not recommended for complex, detailed designs as the weeding can be time consuming. (The Saratoga Stryders logo is white cad cut vinyl adhered to polyester track jerseys.)

So now you know why we ask so many questions when you come in and tell us you want your logo on a t-shirt! We are trying to match your logo with the best printing method to meet your needs. There are pros and cons to each printing method, and we will work with you to determine the best outcome for your logo.

As with any custom printed garment, follow the manufacturer's washing instructions. We recommend washing your shirts inside out for added life.

Sunday, February 7, 2010

It's all about canvas

Did you know that Seaglass Logowear & Promotions offers custom printed framed canvas? With the Roland Versacamm large format printer, we have the ability to print on hundreds of materials, photo quality canvas being one of them. You may have even seen several canvas prints hanging on the wall in our shop. Those photos were taken by S. Christian Photography (www.schristianphotography.com) here in Clifton Park and we now use them as samples in the shop.

A canvas print begins with your creativity (and they make awesome gifts)! Email us your best photo in the highest resolution possible (the higher the resolution the cleaner/clearer the print) and we will work with you to decide the best size for your framed canvas. Once this has been decided we bring your photo into our printing program and set the proper size print area. Then we wait for the printing to finish and the canvas to dry. 

While waiting for the print, we will put together the frame based on the size you chose. Each print is a custom job and only limited by your wall space! Once the frame is connected and stapled for extra stability and the print is dry, it is time to wrap the canvas around the frame. Beginning with one side, the canvas is stapled to the frame; the opposite side is now stretched to ensure a snug fit and stapled. This same pattern is used for the other two sides. Any remaining excess canvas is trimmed and your photo is ready for display!

Frame sizes vary from 8” x 10” to 24” x 36”; which size you choose depends on the final destination of your canvas print as well as the quality of the image you are looking to print. (If you have a very low image resolution we do not recommend printing in the 24” x 36” size as it will look extremely grainy, but you could most likely get away with a smaller size just fine.)


**Photo for canvas demonstration was taken by  S. Christian Photography

Saturday, January 23, 2010

Reviews on the 5.11 Light for Life

It has been nearly six months since the promised innovative, high powered, durable 5.11 Light for Life has hit the market. At close to one pound and nearly 12 inches long, this flashlight has proven itself over and over in numerous markets. With a 90 second re-charge and run time of 120 minutes, this flashlight could be your new life-saver. Here is what our customers have to say;

"Having effective lighting is crucial for treating patients pre-hospitally. The brightness, rapid charge, and light weight of the Light for Life has made it an essential tool during all of my night shifts." (Used in a local EMS agency)

"Don't use the Light for Life in a corn maze; people will yell." (Personal use)

"Ouch, my eyes." (Personal use)

"This flashlight was perfect for our recent family camping trip. My young daughter said it was the brightest flashlight ever (and was not disappointed by the fact it wasn't pink.)." (Personal use)

"As a fire police member, this Light for Life is perfect at any scene. I can re-charge it 90 seconds without losing the ability to control traffic at a cene. The cone tips [flare wand and lens filters] are just what we needed to go along with these flashlights." (Fire Department)

"Many times approaching a scene, you don't know what your lighting/visibility will be. With this Light for Life I know my crew will be able to do their job more efficiently." (Fire Department)

"I purchased a Light for Life from Seaglass Logowear for my wife's birthday. She loved it! I feel much better knowing she has proper tools in her vehicle, ones that I dont't need to check the batterises in on a regular basis!" (Personal use)

Over the next few months, 5.11 will be releasing a smaller version of the original Light for Life. A light 10 ounce flashlight, measuring 8.75 inches long, you will still receive the fast 90 second re-charge with a 100 minute run time. We will let you know once they have hit our store!

Mention this blog posting and receive a FREE AC Adapter for your home with the purchase of a Light for Life. (Limited quantities are available, so act fast.)

Saturday, January 24, 2009

Where has Seaglass been?

I know, I know; I have not updated the blog for a few weeks, but I must say we have been busy! We enjoyed the holiday break, as I hope all of you did, and are back to our routines. This month Steve hosted another training class on the Roland VersaCAMM and had attendees from as far out as California (Kevin, you won the "Farthest Traveled Award"). Steve has also been dilligently revamping garmentua.com, a site designed for digital printers.

In addition, the Network of Young Professionals Committee (Southern Saratoga Chamber) is meeting next week to continue the planning of goals and events for 2009. We are looking forward to a fun and succesful year!

I will post again soon!

Thursday, December 25, 2008

Happy Holidays!

Happy Holidays -
Blogged with the Flock Browser

Saturday, December 6, 2008

A Day of Shopping

As the holiday season is in full swing here, I find myself with less and less "free" time throughout the week. This week I completed more orders than expected but spent more hours than hoped at work, but it is all worth it! Today I finally (after 2 weeks of procrastination) spent the afternoon shopping for our adopted "angels" sponsored by the Chamber of Commerce anually. Catie's help was much appreciated! Daphne (8), Patricia (16), Joe (13) and Tal (11) will each have some useful and fun items this holiday! Thanks to all those who have helped with those "paper angels" on the trees in the malls and who have sponsored children & families this holiday season!

Wednesday, November 19, 2008

Too busy....

For all those who have been watching for the updates, I have been slacking; more like focusing on your pending orders! It has been a busy week completing the line of 5.11 polo shirts for the Stratton fire department, outfitting the new Clifton Park Halfmoon Ambulance Corps personnel with their uniforms and showing off the new 5.11 Station Wear line to Ballston Lake EMS, Waterford EMS, Albany Airport and Verdoy Fire.

We are getting into our busy season as we finish off the year, (so get those holiday gift requests in early) so I may not update as often. If I don't update before the big Turkey Day, have a safe holiday!

Sunday, November 2, 2008

Versacamm 101

Friday morning began with old friends and new faces! Jean & Richard C. joined us again for another training class on the Roland Versacamm, taught by none other than our very own ... (Yes, you guessed it) Steven Jackson! With Mary Anne, Laura, Irv, Paul and Eloise the chit chat began and soon we realized there was a Navy man, Army man and a Marine in the shop and it was going to be a LONG day of comparing "war stories"!

What began as simple introductions led everyone to realize the similarities in each others circumstances and business plans. Each individual was the proud new recipient of a Roland Versacamm, different models, same concepts working with similar niches and under similar conditions. Each student had started out in comparable situations to Seaglass Logowear, which led to stronger bonds and most of all the realization of future practical and successful achievements.


When planning this day, Steve thought long and hard about the struggles he encountered when we first purchased our Versacamm, and what he wished he knew then. So this is where the day began, taking a concept from a customer, creating the graphics and inputting it into Versaworks, and ultimately printing the design on numerous types of materials. It was impressive to see the versatility with this piece of equipment, as Steve had shown off a picture we had printed on canvas. (Unfortunately no picture to show right now, but I will get one for you soon.)


Another important aspect often forgotten with new equipment is the cleaning and maintenace aspect; I must say my least favorite and Steve knows it. (Thankfully one of us is mindful of the up keep on our machines!) This is imperative for any business, and thanks to Steve a little easier to understand.


Each student learned the "art of weeding", the pros and cons to numerous printable materials for apparel and the process of pressing these onto shirts. The materials each individual weeded, masked and pressed were printable reflective, metallic, opaque, clear, glitter, puff, sub block, color print and flock. The same colorful design was used on each material to show the difference in shades when pressed onto shirts.


In addition, Steve discussed the non-apparel items the Versacamm is capabale of including banners, magnets and vehicle wraps. This machine does not limit your business at all and is a valuable asset to any apparel printing business.


By the end of the day there was interest in hosting more training events and remaining in contact with each other in the event of questions and better yet, major successes with the Versacamm! By Saturday morning we had received three emails regarding the exciting trials of different students and the gratitude for hosting the class. Steve and I, as always had a wonderful time meeting new individuals in our industry and sharing our knowledge. We hope to do this again soon!

Sunday, October 26, 2008

5.11 Roadshow BBQ

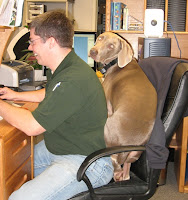
A long week, ended with a day of fun at Seaglass Logowear which wound down around 10:30 Friday night. Our 5.11 Roadshow BBQ went off without a hitch! The prep was done throughout the week, with Thursday being a late night. Christina and Mike (our 5.11 rep) came in to assist with weeding the promotional Hook & Ladder tees. Mike had never weeded before and found the process a bit tedious (and doesn't feel the word "weed" represents the process... although the best he could come up with was "picking" which we all agreed was unrepresentative. Any ideas?) Because the letters had some small pieces that were to remain on the print, he was pleased (as were the rest of us) when he completed the weeding of a single design, without losing a single "little extra piece". He was kind enough to show it off in the picture below. It's amazing how morale and productivity can improve with pizza and beer as a motivator! (Although, as you can see, it didn't work with Charlie!)


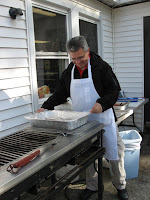
Friday began extremely early for Steve and I; we were at the shop by 7 cleaning up from the evening before and moving the tables and chairs around. Fernando, a rep from 5.11 who flew in from California for our event, was our chef for the day. He was dedicated enough to be out grocery shopping unil 10 pm Thursday evening...he began before noon that day! Fernando arrived just behind us and began prepping the food and assisting with the setup of the rest of the place. He was out there hovering over the grill as it was about 30 degrees that early on Friday morning, a little chillier than California!


By 10:30 Christina, Mike and Catie had arrived, banners and balloons were on display by the roadway, announcing our big day, and we had 2 phone calls for directions...a sign of our soon-to-be-success! Even Stone had his balloons in hands, as you can see here posing with Catie.


Soon we had numerous individuals shopping at Seaglass Logowear and reviewing the new Fire and EMS line. I am pretty sure the first glass of beer (Hook & Ladder Golden Ale) from the tap was poured by 10:30! Mike and Christina were showing off the Cams 40" Outbound Bag to a group while Steve was discussing the new 5.11 1/4 zip job shirts with a local fire department. (I love these new job shirts...and if you haven't seen them, stop in and take a look - no fade, no shrink - honest! They are awesome!!)


From what I heard throughout the day, unanimously, the London Broil was delicious! Fernando is welcome back any time to assist as chef for the day! He put on a tasty spread for all to enjoy! Topped with a Hook & Ladder brew, you could not go wrong!


Throughout the day I caught Mike taking a break with his feet on MY desk. I allowed it as he was working diligently throughout the day. After this he did show off his laptop wrap, courtesy of Steve!


Stone was another team player today and sold the boots off his feet (and he has big feet) .... No really....

For those who didn't see it, we had a prototype of the new Light for Life flashlight 5.11 will have available in January 2009. We took several pre-orders on Friday for these as they are set to be unavailable until mid 2009 unless pre-ordered. Here is the link to the blog created by 5.11 for these flashlights. (http://www.511tactical.com/lightforlife.html) With this new technology, this flashlight will be the only one you need!

At the end of the day, we decided the most popular items were the 1/4 zip job shirts, ATAC boots and VTAC bags for tactical operations. I was quite busy throughout the day and unable to take many pictures, so if you didn't make it in the blog I'm sorry. But I hope you enjoyed yourself nonetheless! Thank you to all of those who came to show their support and enjoy the discounts, food, beer and freebies! We could not be who we are without you!


Anatomy of a Jersey

360 degrees, set; 4 second pre-press, set; 6 second press, set; The heat press is set and warming up for the Clifton Park Mite and Mini-Mite Hockey teams jerseys. So what's next?

Each jersey initially received the front Eagles logo. These logos, although not screen-printed in house, were created using a screen printing method. We sent the image to a company who screen prints the logo onto sheets of transfer paper using plastisol inks, partially cures them and ships them to us. We generally refer to these as "tranfers". As these prints were to adhere to polyester mesh jerseys, specialty inks were used. With added opacity and durability, the prints were lightweight and had a very soft feel.

Once the prints arrived, the heat press was set and a logo was pressed onto the front of each jersey. For printing 124 jerseys, I was getting toasty standing over the heat press for 2 hours! The initial step in the mission was complete!

Now that the basics were finished, I was waiting for the names and numbers going on each jersey. The setup was to be a 2.5" tall name and 8" tall number across the back, and a 3" number on each shoulder. Since the coaches weren't going to have a final list until 3 - 4 days prior to needing the jerseys, the same transfer method used for the front logo was not going to work for the rest of the jersey!

Although this meant a bit longer process for finishing off each jersey, I ordered a 50 yard roll of white vinyl material. Each name and number was prepared in the computer using our graphics program and sent to the "cutter", a Roland GX24. As the jersey specifics arrived from the coaches, I began cutting in a somewhat organized fashion (cut a few names, weed a few names, cut a few numbers, weed a few numbers, press a few jerseys; repeat).


Once the vinyl was cut it needed to be weeded. The remaining vinyl (everything except the name or the number) was removed using a pick (a dental pick believe it or not). Once the names and matching numbers were complete, I pressed the jersey. There were 4 pressings per jersey. Each sleeve was done separately, followed by the back name and number.


With each "mini-step", the total time to complete each jersey was around 8-10 minutes. This of course, is not the most time effective way to complete a jersey, but for a coach requiring a short turn around time, this is what works. With a few stragglers joining the team, using this printing method allows us to turn around a jersey within the hour. A superior addition to our customer service!

Saturday, October 25, 2008

Did You Take a Picture?

There are two versions to the story you are about to read, the truth, and Steve's extended version.

October 14th, I was working on numerous projects around the shop (as usual). Pet Lodge had placed an order for another round of t-shirts with a full color print. For these we print the logo onto opaque solutions (thin white vinyl) and weed (with a dental pick) around Lodger. (I then place a heat sensitive mask material across it to transfer the print to the t-shirt.) Well, as I was weeding, I needed to grab a box down from the back shelf. Being the multi-tasker that I am, I held the dental pick in my left hand and reached for the box. The box stuck to another and they both started to come down. Using my typical gracelessness, I put my hands out to prevent the boxes from falling and ended up impaling the dental pick into my hand.


(For those with weak stomachs, skip this paragraph.) The pick punctured the skin approximately 3/4" below my left pinky finger. With the pick about an inch and a half deep into the skin, I panicked for a second and decided to try and pull this out! Yeah, didn't work so well. Then the EMT in me kicked in and I reminded myself the rules about impaled objects....don't pull them out! So I called Steve and this is how he describes our conversation;
J - Hkjsa hskldah cdshjkfhwp shfklashgd
S - Are you okay?
J - Hkjsa hskldah cdshjkfhwp shfklashgd
S - What happened?
J - Hkjsa hskldah cdshjkfhwp shfklashgd
S - Do I need to call 911?
J - NO

So once I finally spit out what had happened, I hung up with him and went to CIS. Thankfully John and Teresa were there and John drove me to Urgent Care. Once I was in there, the pick was out within 5 minutes (and numb...boy did I appreciate that!). In my line of work, a dental pick puncturing a hand seems out of the ordinary, so I had to explain what we actually use the picks for; An intriguing concept for most! (I had a few extra faces pop into my room to check out the incident!)

Steve arrived shortly after while I was finishing with my good ol' tetanus shot. Steve had only two questions for me. Thankfully he asked the correct question first, "Are you okay?"; This was followed by the line "did you take a picture?". What a guy! The jokes started flying after this and we all had a good laugh (the doctors, nurses and Steve more than I).
Steve drove me to the pharmacy and back to work shortly after this and was disappointed upon his arrival, noticing there was no blood anywhere in the shop! The extended version he created at this point, consisting of "gushing" and "spurtting", was the big joke around Seaglass Logowear for a few days.
It has been nearly two weeks, my hand is almost back to full function without pain. I was lucky not too do more damage! Don't worry Matt, we have joked about the incident and I don't hold you or Lodger responsible! (Sorry for the delay in the shirts!)
The valuable lesson learned, don't multi task with a dental pick in your hand!
Now every time Steve, Christina, Catie or Loressa sees me walking with one in the shop, they move out of the way and tell me to put it down! Fear!

Sunday, October 5, 2008

Seamstress Steven

Seamstress Steven emerged from the dark shadows of Seaglass Logowear! How did that happen, you ask?


The Clifton Park Youth Hockey Association is purchasing jerseys from us for the Mini-Mite and Mite teams, and Thursday came to us about name plates for the travel team jerseys. After a little research, we decided it was something we could do at a competitive price, quickly. We had a completed sample by Friday afternoon, the blank name plates ordered and delivered for overnight standard delivery Tuesday. With the names in hand, the setup process began Wednesday, which left Thursday for the embroidery day. What began around 3 pm Wednesday, wrapped up around 10 pm Thursday.


The lengthy process of name plates began with Steve taking the name and inputting the details/measurements into the digitizing program. Once he had all of the files setup for the cutting and stitching, he sent them along to me. I then took the cut files and uploaded themto the Roland GX24 for cutting the tackle twill (applique material). For each name, there are 4 cut files (2 different sizes per name, per name plate color - black vs. white). All names were run within 1 hour and set aside while I began the initial name plate.


Once the file was inputted to the embroidery machine, stabilizer was hooped and the design was aligned. An outline of the name plate was stitched onto the stabilizer (to which the name plate would be secured using "sticky back") allowing ease of name plate placement, matching with the lettering. Once the name plate was secured to the stabilizer, an outline of the first letter was stitched, the machine was automatically set to stop allowing the initial to be placed onto the plate. With pressure sensitive adhesive on the back of the twill, the initial was secured and then the tack down was stitched (This is the top outline securing the letter to the material.). This process is done for each letter across the bottom layer, then again on the top layer. On average, these name plates took about 35 minutes apiece, making it a long day and night!


Once Steve arrived Thursday afternoon, I continued to babysit the embroidery machine while he moved forward. Myself being a somewhat annnoying perfectionist when it comes to sewing straight lines, Steve offered to complete the hemming! With a short crash course on sewing, he was off! While Steve was on a short break, Charlie made a futile attempt at hemming these name plates; Lack of opposable thumbs was a major problem!